 Refill Instructions Refill Instructions
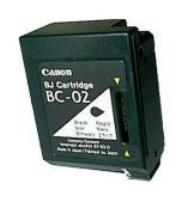
Canon BC-01, BC-02,
and BC-05 Cartridges
Also Apple M8052GA, M8041GA, and M4609GA Cartridges. Many different Canon and Apple Stylewriter PrintersTheoryThe ink in this cartridge is retained because the cartridge has an internal sponge. 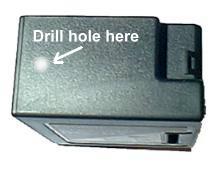 InstructionsStep 1) Put the cartridge on some paper towels in an area where you can tolerate a spill. Step 2) For the BC-01 start a screw into the vent hole located on the opposite end of the longest side from the print head. Step 3) Pull the plug out with the screw. Step 4) For the BC-02, drill a 1/16 inch hole at the same location -- on the longest side of the cartridge at the opposite end from the print head. There is a small hole there which has been plugged -- this is the ideal spot. Step 5) For both cartridges, fill the syringe full of ink (about 15 to 17 ml). Insert the needle fully through the hole. 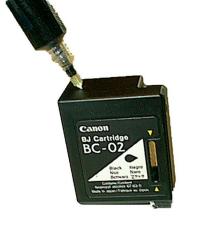 Step 6) S-L-O-W-L-Y inject the ink into the sponge. Insert and withdraw the needle at different angles to expose the entire sponge to the ink. Inject deeply. Step 7) Set on a paper towel for an hour as a drip precaution. Don't allow the printhead to touch the paper towel or all of the ink will be drawn out. Expect a few drips -- If it doesn't drip, the ink is not ready to print. It is not necessary to seal the hole except during long storage and transportation. BC-05 Cartridge Step 1) Put the cartridge on some paper towels in an area where you can tolerate a spill. Step 2) Locate the three vent holes on the longest side of the cartridge at the opposite end from the print head. Each hole leads to a seperate color chamber. Step 3) Use a 1/16th inch (2 mm) drill to open up these vent holes, using them as starter holes. Drill just through the plastic top. Step 4) Insert a toothpick or unbent paper clip into the holes to determine the color of the ink in each of the three color chambers -- magenta, cyan, or yellow. Step 5) Tape over the two holes you aren't currently filling to avoid accidental contamination with the wrong color of ink. Step 6) Fill the syringe only 1/4th full of ink (about 2 ml). Insert the needle fully through the hole. Step 7) S-L-O-W-L-Y inject the ink into the sponge. Insert and withdraw the needle at different angles to expose the entire sponge to the ink. Step 8) Recognize that each color is not used equally, and therefore, only one color will take the full 2 ml. Step 9) Remove all tape and set above a paper towel for an hour as a drip precaution. Don't allow the printhead to touch the paper towel or all of the ink will be drawn out. Expect a few drips -- If it doesn't drip, the ink is not ready to print. It is not necessary to seal the hole except during long storage and transportation. Step 10). Replace the cartridge and run 1 - 3 cleaning cycles as per printer instructions.
Or print the following page:
http://www.refillinstructions.com/black.htm for Black
If necessary leave cartridge in printer for up to 24 hours. .
| 


 в совершенно новом дизайне!")


комментарии